
BYOPi Installation
The ClawStage CS-01-N is our Bring Your Own Pi version. Follow the steps below to install your Raspberry Pi 5 and set up your device.
Flash the
System Image
01.
Prepare a microSD card
We recommend a microSD card with a capacity of 32 GB or more.
02.
Download the ClawStage system image
Download the system image. Please use the image we provide—it includes all the apps and services your ClawStage device needs to run.
Image MD5: 5f125f58bbe4545cb8bcecbf46b56a4a
03.
Download the flashing tool
Download Raspberry Pi Imager and install it on your computer.
04.
Write the system image to your microSD card
Connect the microSD card to your computer and open Raspberry Pi Imager. Follow the steps below to write the downloaded image to the card.
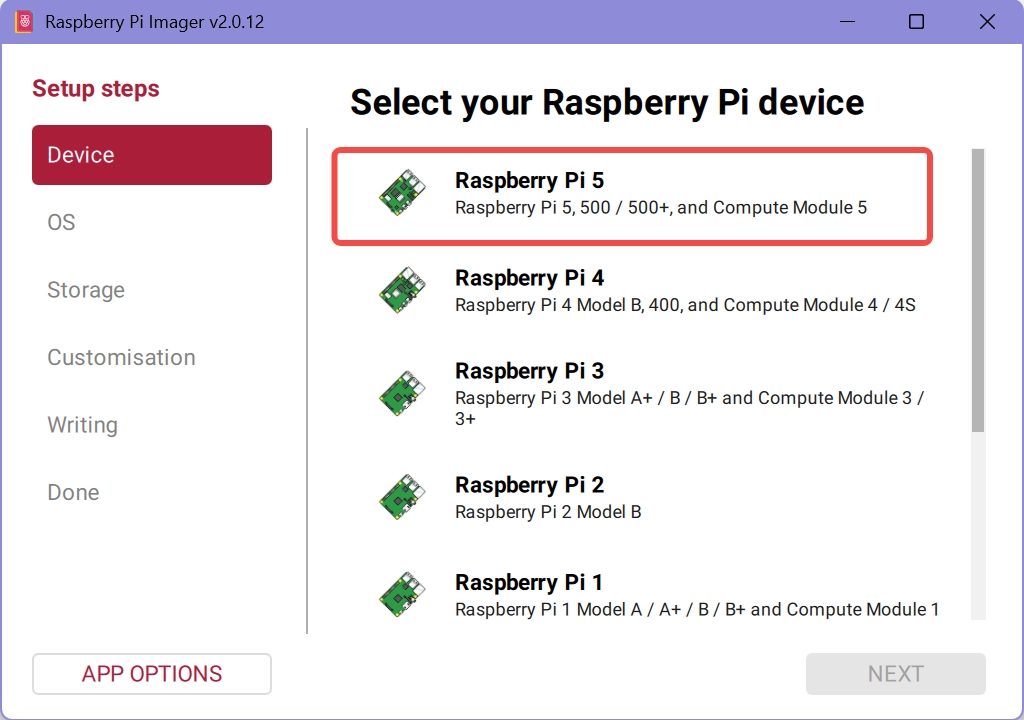
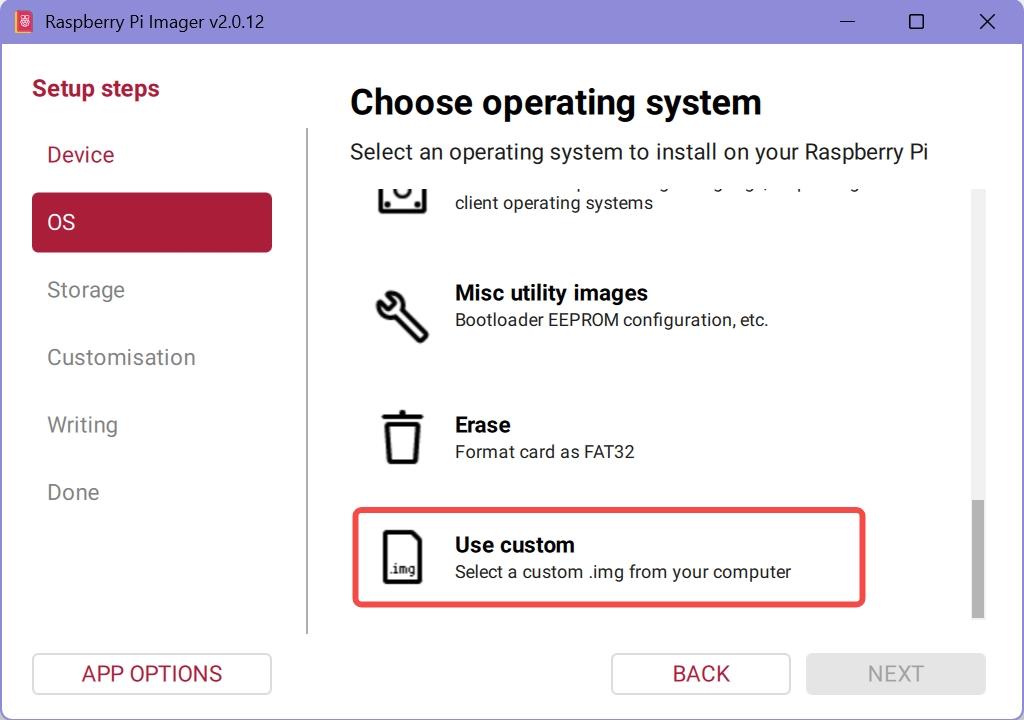
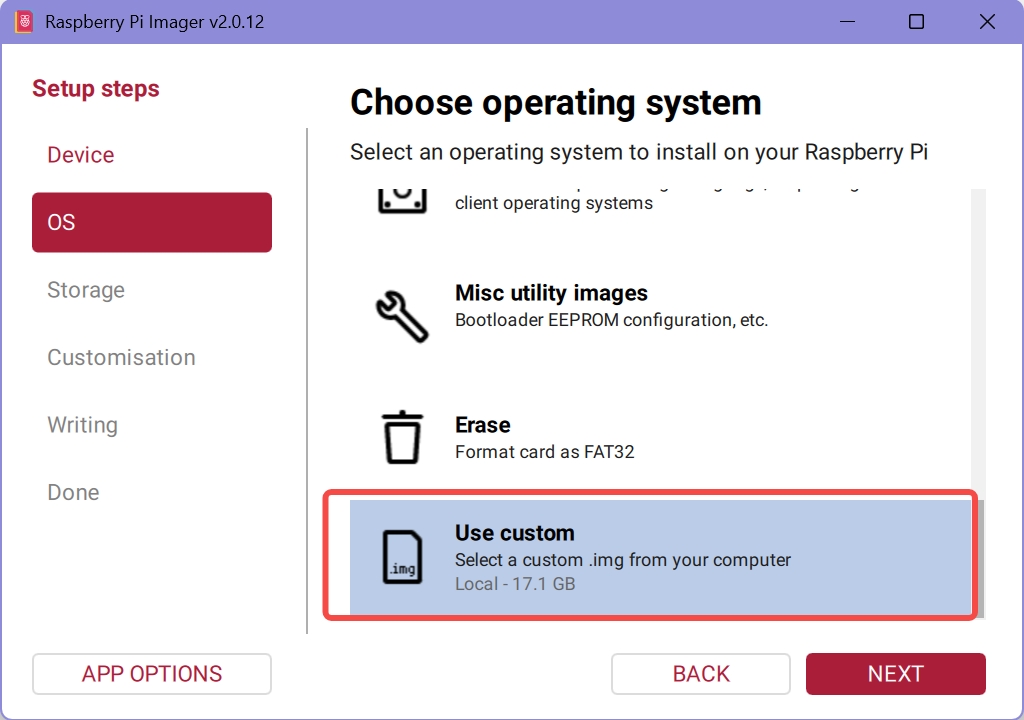
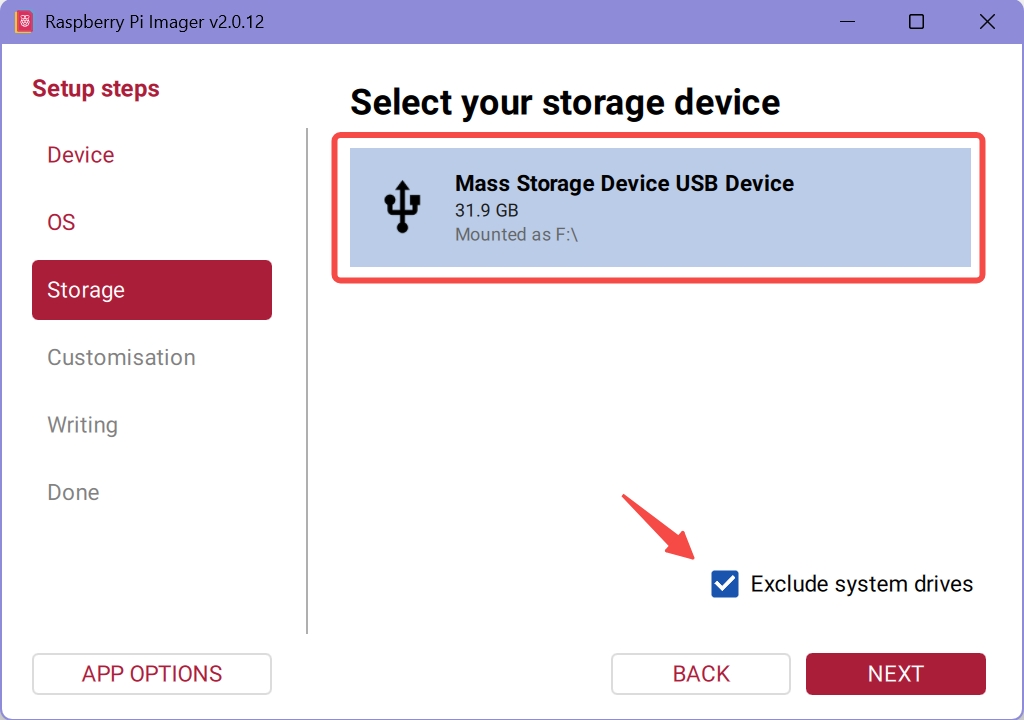
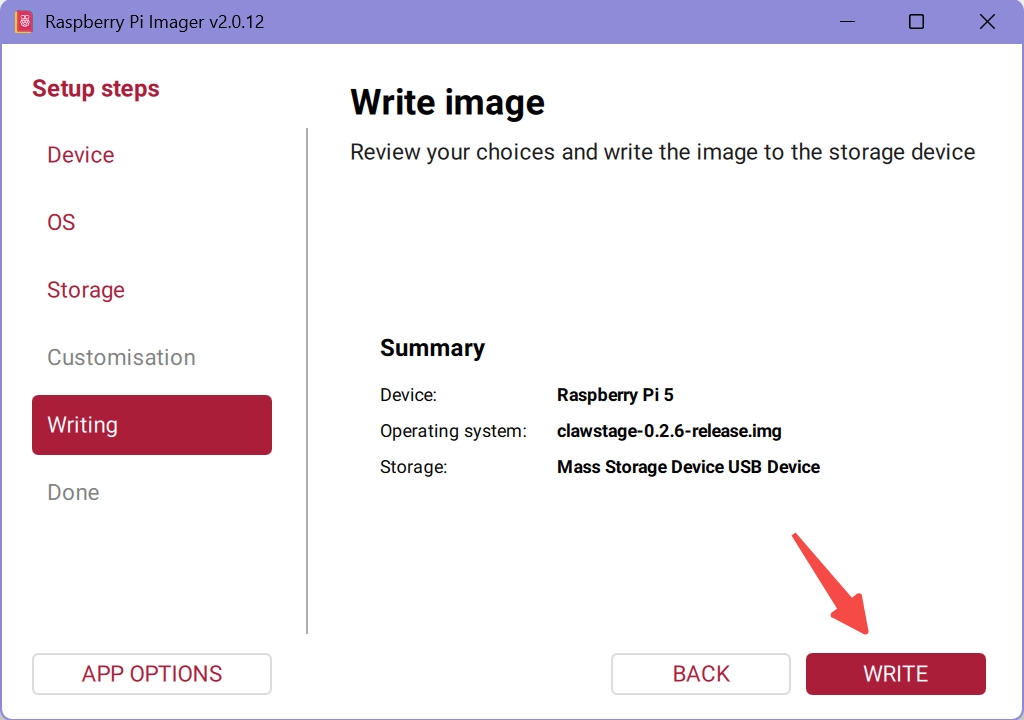
Once writing and verification are complete, safely eject the microSD card. Your system card is ready to use.
Install Your
Raspberry Pi 5
To set up your CS-01-N, you'll need to install your own Raspberry Pi 5. This involves removing the bottom cover, connecting the internal cables, preparing the system, and reassembling the device before turning it on.
Before you begin
Disconnect the power supply and all external cables.
You'll need your own Raspberry Pi 5 (we recommend the 8 GB model). The package includes the thermal pads, heatsink, two spring clips, and mounting screws needed for installation.
For instructions on preparing the microSD system card, see Flash the system image.
Remove the bottom screws
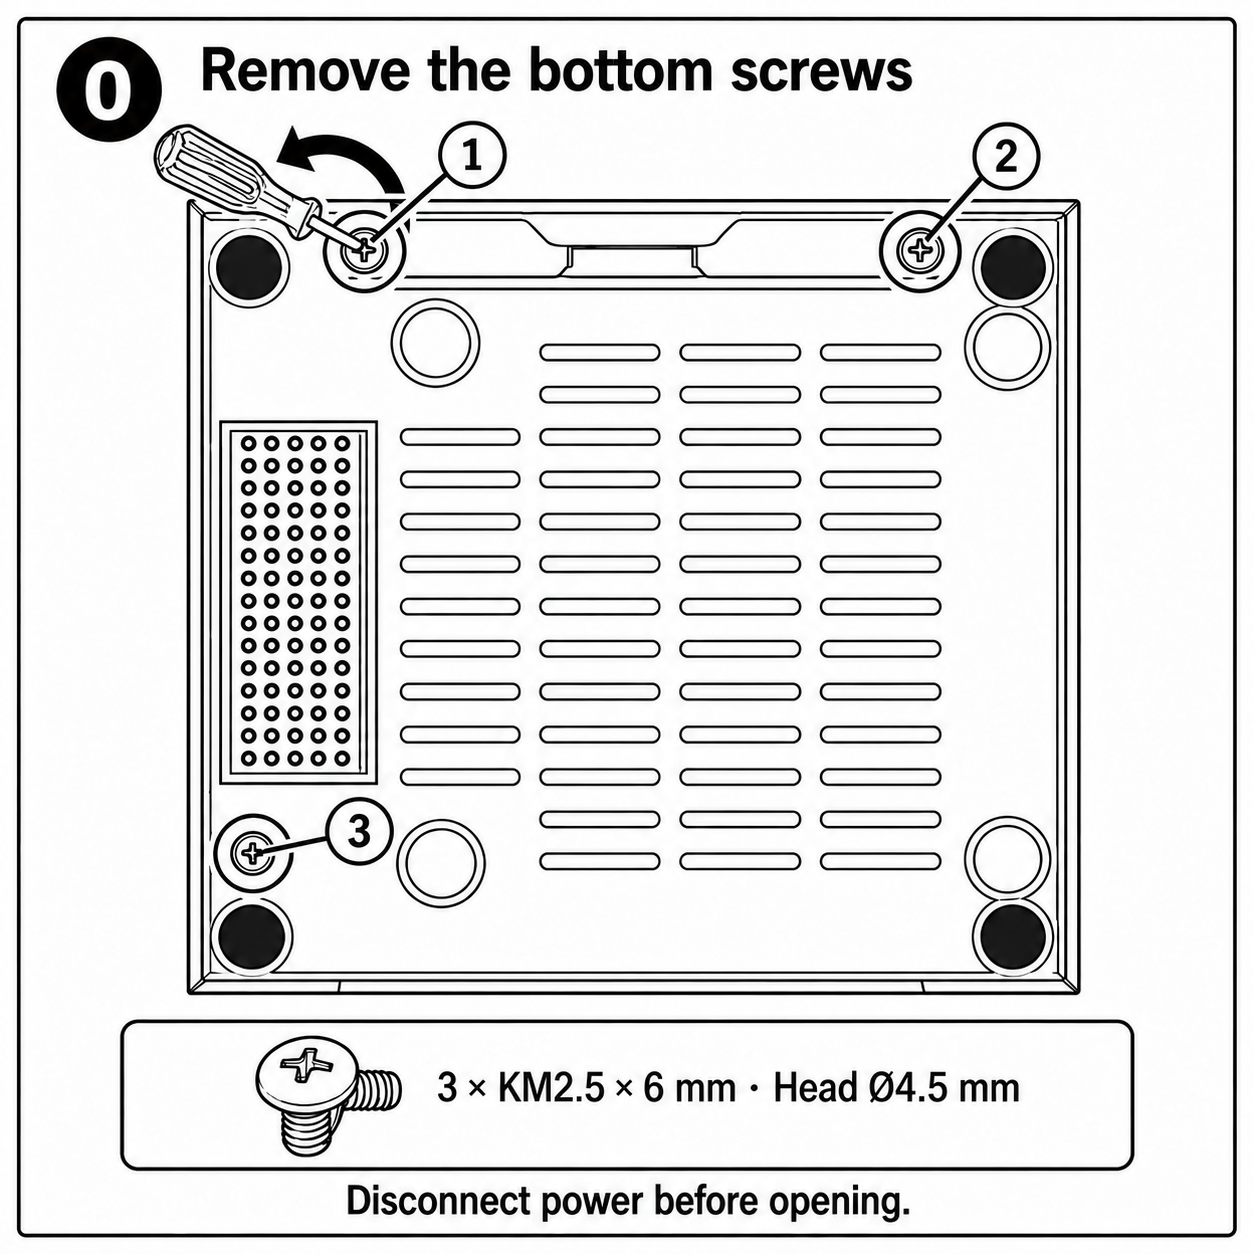
Position the device with the bottom facing upward. Support it securely so that no pressure is placed on the screen.
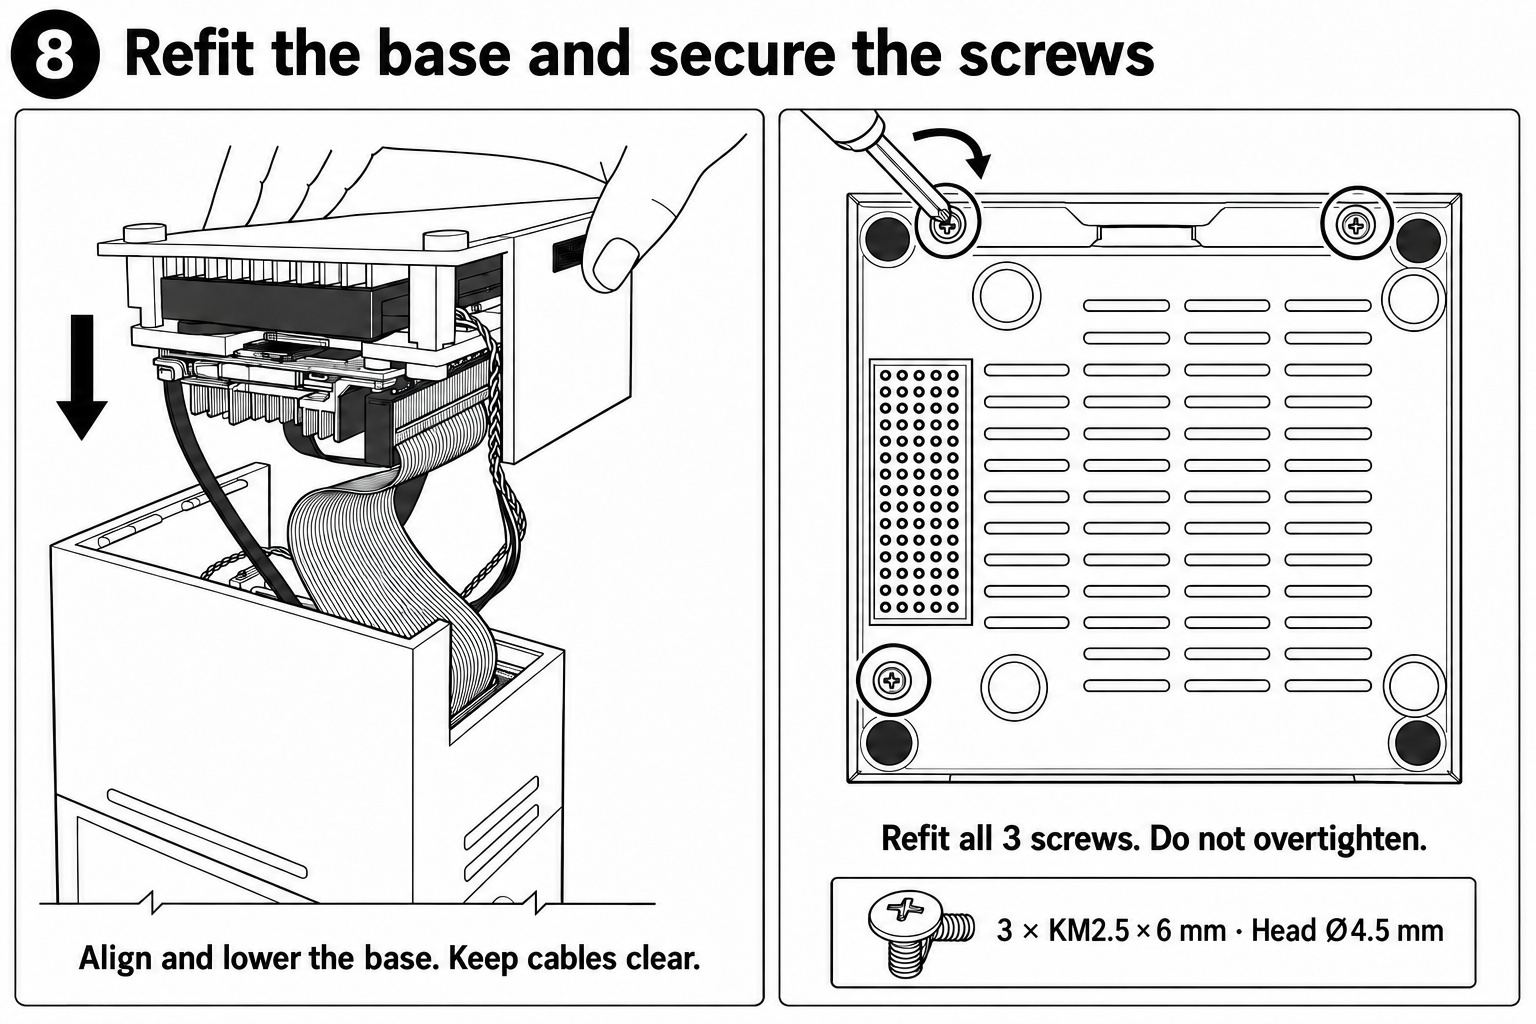
Remove the three bottom screws marked in the illustration and keep them for reassembly. The screws are KM2.5 × 6, with a head diameter of Ø4.5 mm.
01.
Remove the base and prepare the parts
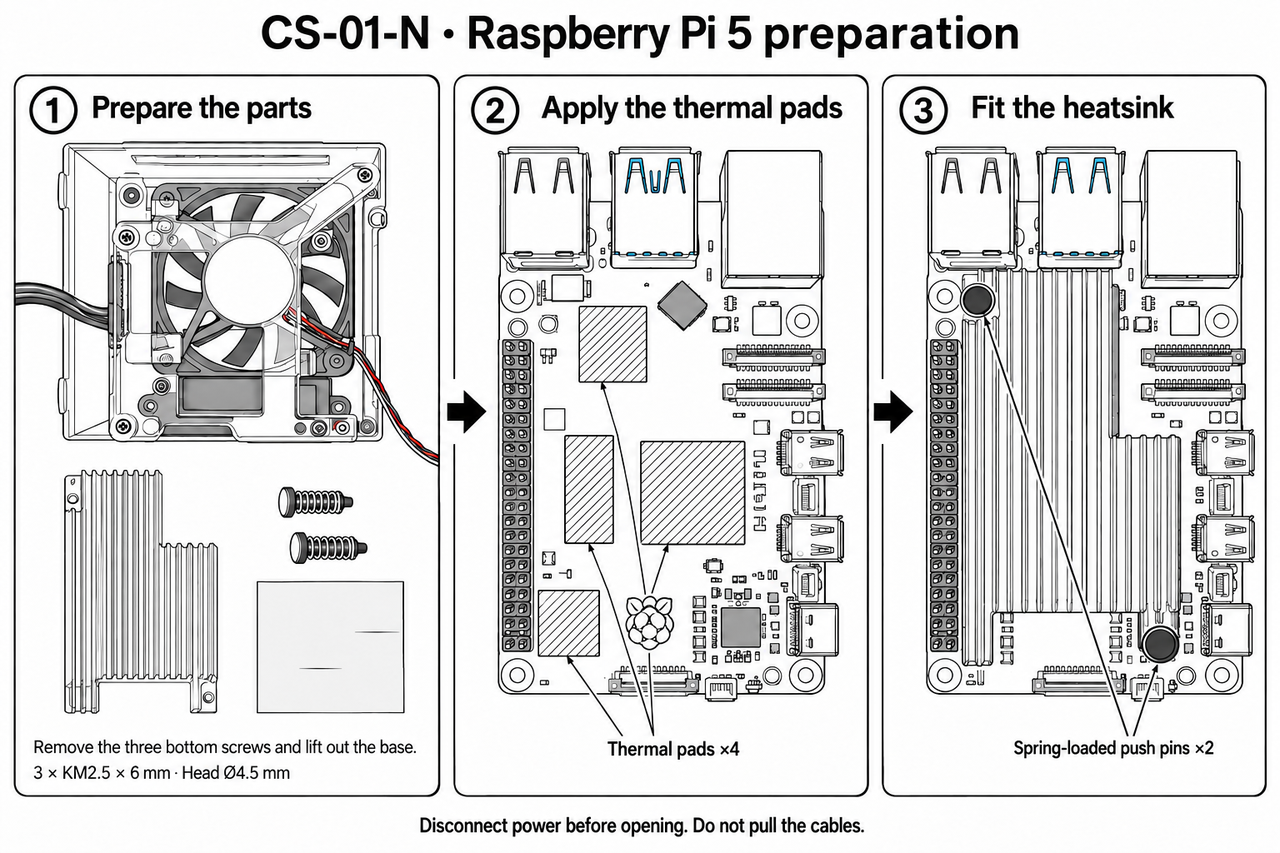
Carefully remove the base assembly, keeping it supported to avoid pulling on the internal cables. Have your Raspberry Pi 5 and the included installation accessories ready.
02.
Apply the thermal pads
Place the thermal pads on the four Raspberry Pi components marked in the illustration. Make sure each pad is firmly attached and does not cover any ports or mounting holes.
03.
Install the heatsink
Position the heatsink as shown in the illustration, ensuring it rests evenly against the thermal pads. Secure it with the two spring clips at diagonally opposite corners.
04.
Secure the Raspberry Pi
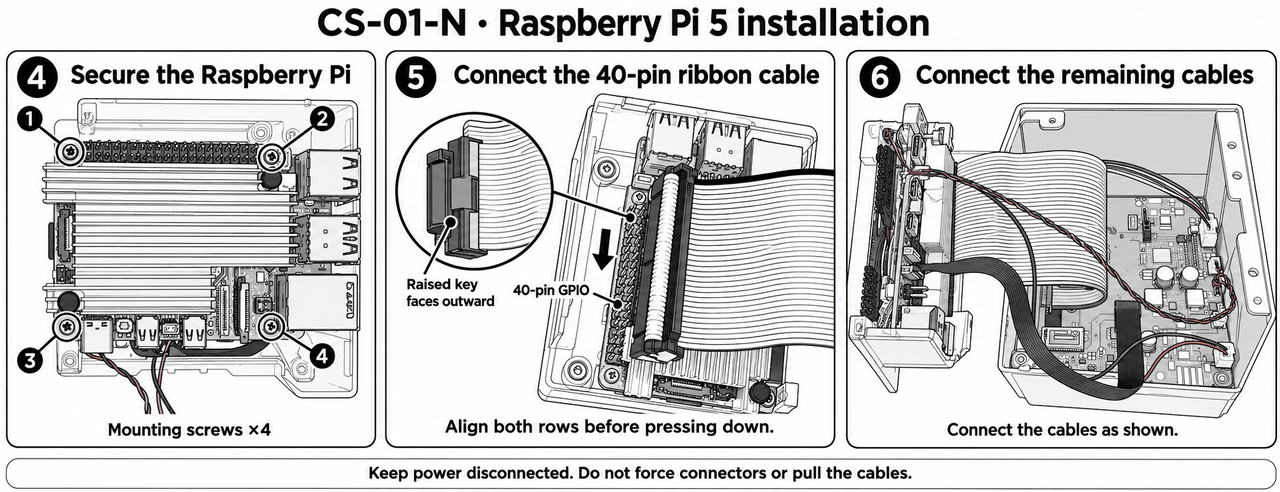
Place the Raspberry Pi, with the heatsink attached, onto the base bracket. Align its ports with the openings in the enclosure and line up the four mounting holes. Secure it with the four included screws, taking care not to overtighten them.
05.
Connect the 40-pin ribbon cable
Align the connector with both rows of GPIO pins on the Raspberry Pi, as shown in the illustration. The raised mark on the connector should face outward, away from the heatsink.
Check that all pins line up correctly, then gently press the connector straight into place. If it does not fit easily, check the alignment again. Do not force it.
06.
Connect the remaining cables
Connect each cable to the matching port shown in the illustration. Check that each connector is facing the correct way and is fully inserted.
Keep the base assembly supported and leave enough slack so the cables are not stretched tight. Avoid pulling on the ribbon cable or putting pressure on the connectors.
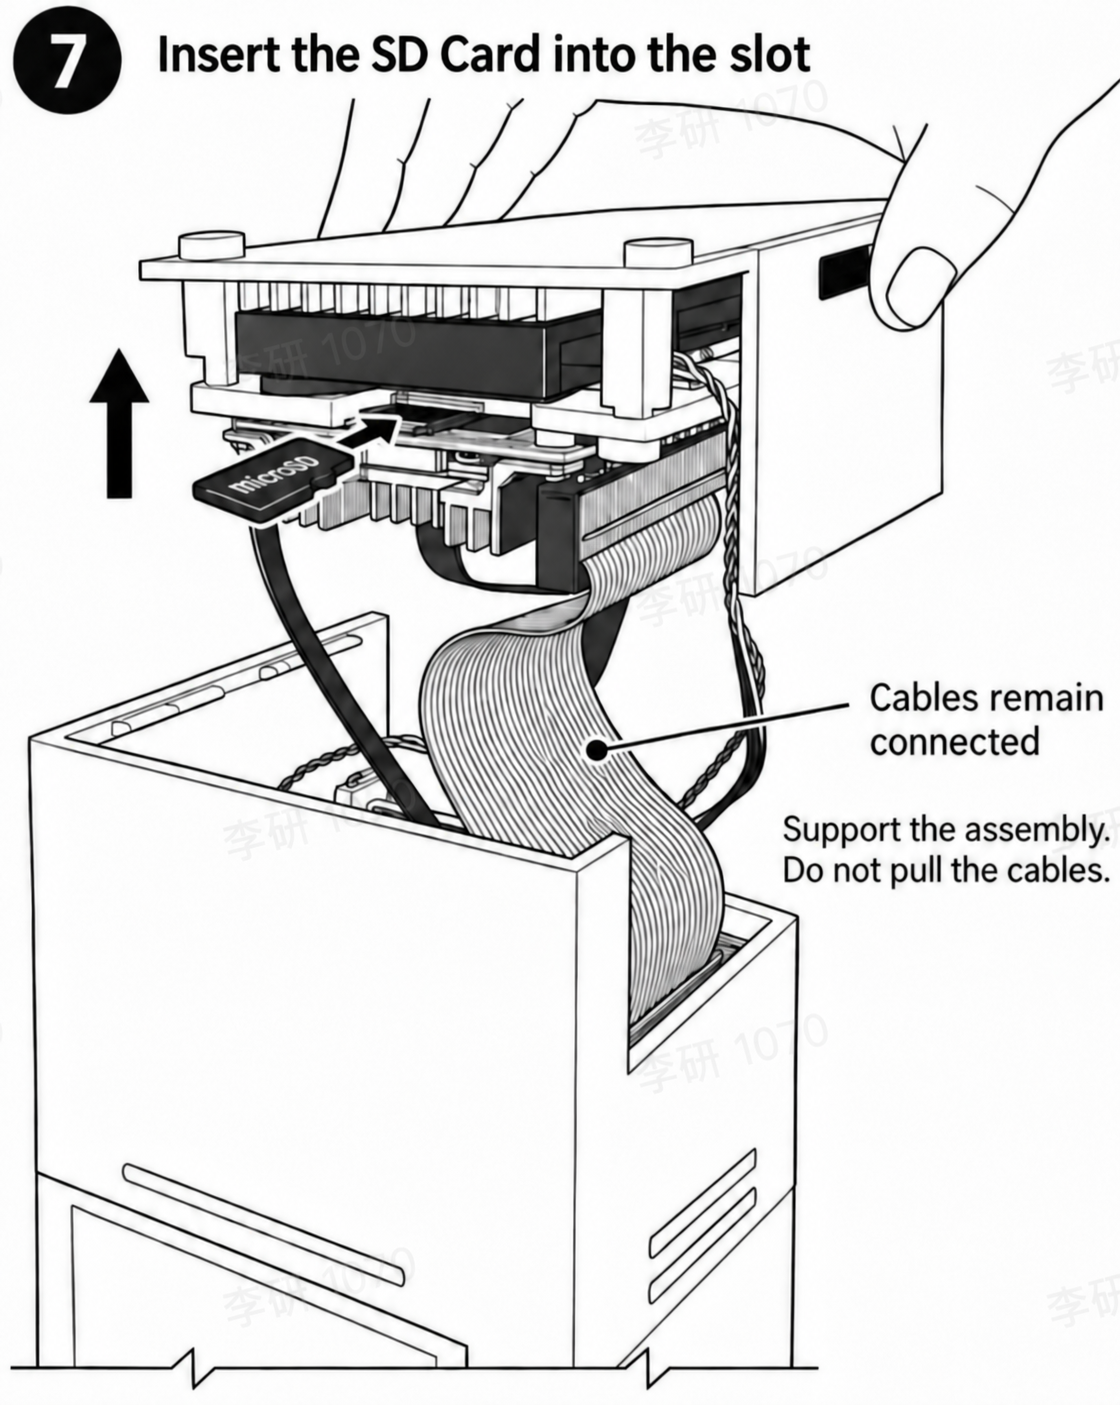
07.
Insert the microSD system card
Insert the microSD card containing the ClawStage system image into the card slot at the front of the Raspberry Pi. Check the card's orientation against the illustration, then gently slide it in until fully inserted. If you feel resistance, check the orientation again. Do not force the card.
08.
Reinstall the base
Check that all cables are securely connected and that the microSD system card is installed.
Arrange the cables so they will not get pinched when the base is closed, and make sure they are clear of the fan.
Align the base assembly with the device and carefully fit it back into place. Secure it with the three bottom screws removed earlier, taking care not to overtighten them.
09.
Start the device
Place the device upright and connect the power supply. It will start automatically. Please wait for startup to complete without pressing the power button.